“This recipe has been my top pick this month—I’ve made it six times and it’s still just as good!”
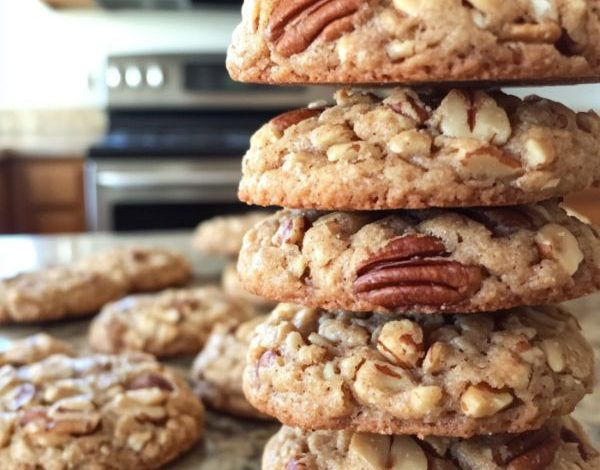
Pecan Sandies are a timeless favorite, loved for their delicate, crumbly texture and rich buttery flavor. Studded with finely chopped pecans, these cookies strike the perfect balance between simplicity and indulgence. Whether you’re putting together a holiday dessert tray or savoring a sweet bite with afternoon tea, Pecan Sandies never disappoint.
Ingredients for Perfect Pecan Sandies
Using good-quality ingredients makes all the difference. Here’s what you’ll need:
| Ingredient | Quantity |
|---|---|
| Unsalted butter, softened | 1 cup |
| Granulated sugar | ½ cup |
| Powdered sugar | ½ cup |
| Vanilla extract | 1 teaspoon |
| All-purpose flour | 2 cups |
| Baking powder | ½ teaspoon |
| Salt | ¼ teaspoon |
| Pecans, finely chopped | 1 cup |
Step-by-Step Instructions
1. Prepare the Oven and Pan
Preheat the oven to 350°F (175°C). Line a baking sheet with parchment paper to prevent sticking and promote even baking.
2. Cream Butter and Sugars
In a large mixing bowl, beat the softened butter, granulated sugar, and powdered sugar until light and fluffy. This step creates the signature tender crumb of Pecan Sandies.
3. Add Vanilla
Stir in the vanilla extract until fully blended to enhance the cookie’s flavor.
4. Combine Dry Ingredients
In a separate bowl, whisk together the flour, baking powder, and salt. Gradually add the dry ingredients to the butter mixture, mixing just until combined. Avoid overmixing.
5. Add the Pecans
Gently fold in the chopped pecans, making sure they’re evenly distributed throughout the dough.
6. Shape the Dough
Roll the dough into 1-inch balls and place them about 2 inches apart on the prepared baking sheet.
7. Flatten the Cookies
Lightly press each dough ball with the bottom of a glass or your hand to create the classic Pecan Sandies shape.
8. Bake
Bake for 15–18 minutes, or until the edges are lightly golden. Take care not to overbake to preserve their soft, crumbly texture.
9. Cool and Serve
Allow the cookies to cool on the baking sheet for a few minutes before transferring them to a wire rack. Once cooled, they’re ready to enjoy!